
Starting a travel blog has been one of the best decisions we’ve ever made! It allows us to share about our travels, look back on all the wonderful things we’ve seen and done, and connect with other awesome people (like yourself!).
When we first started The World Wanderers, we had no idea what we were doing! We’ve learned a lot on this journey, and now it’s time to pay it forward by sharing how you too can start a travel blog.
We’ll take you through how to create a great travel blog in 6 simple steps! Let’s get started!
Step 1: Decide on a Topic & a Name
Okay, so you probably already decided that you want to write about travel if you’ve made it here, but what kind of travel? Long-term travel? Travel with kids? Budget travel? Travel in a specific destination? Knowing what you want to write about is going to be a key step in deciding your name.
Once you’ve decide what you want to write about, it’s time to choose your name.
Do you want to be First Name Travels or something more unique? Whatever it is, you’re going to want to make sure your domain is available for purchase before you dive in! You can check that here!
When it comes to naming your blog, you want to take into account the following things:
- The name is accurate to what you’re going to write about
- It’s easy to spell, pronounce and remember
- It’s available as a .com, but also on all major social media platforms (this is something we didn’t do and it’s the reason why our social media doesn’t all match our website and podcast name – avoid this mistake if you can!)

How did we choose The World Wanderers?
Since there are 2 of us, it felt weird to use our names (Ryan & Amanda Travels doesn’t have a particularly charming ring to it, and it’s mega long!). We also wanted something that accurately described what we were going to be talking about on our podcast and blog: travel. But, travel is such an overused word that we decided to go with wander. Soon enough, wander turned in wanderers and since we travel to all different destinations, we landed on The World Wanderers.
If you’re struggling to come up a name, we would suggest making a listicle with 5-10 names on it and see i any of them stick!
Step 2: Buy Your Domain & Set up Hosting
When it came to figure out how to buy our domain and set up our domain, we were totally lost. Fortunately, we had other great resources (like this one) that recommended Bluehost to us.
We’ve been using Bluehost for 4 years now and have used it to create four of our own websites, and number of other websites for clients. The rates are affordable, it’s easy to understand, and if you ever have a problem, the customer service is amazing.
On top of that, Bluehost is extremely affordable. You can get started for only. $3.95 a month, and when you buy your hosting through Bluehost, you get your domain for free. We really love that it’s a one stop shop for both your domain and your hosting, which makes everything so much more simple.
Setting up your hosting is really easy, and only takes a couple of minutes. Here’s how you do it:
Head to Bluehost’s homepage and you’ll get this screen:
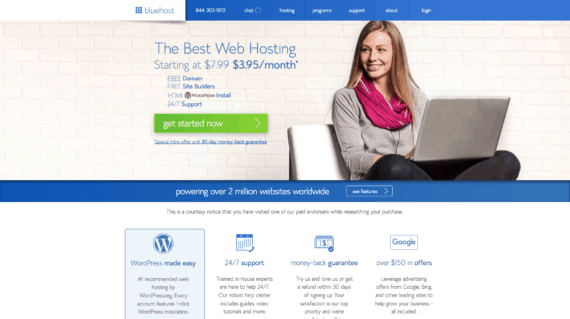
Hit the green “get started now” button and you’ll be taken to Bluehost’s “select a plan” page:
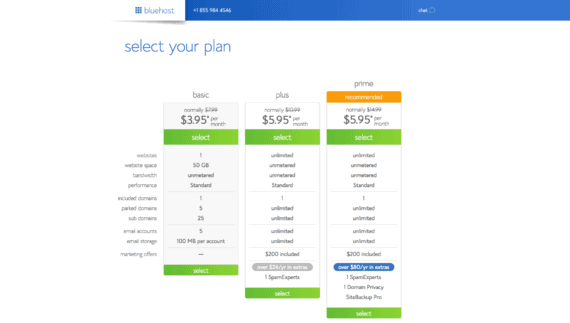
Choose which plan you would like! We would recommend starting out with the basic plan. Bluehost makes it super easy to upgrade your plan if you need to in the future, so don’t stress about being locked into a plan that isn’t going to serve your needs.
Hit “select” and you’ll be taken to the following page:
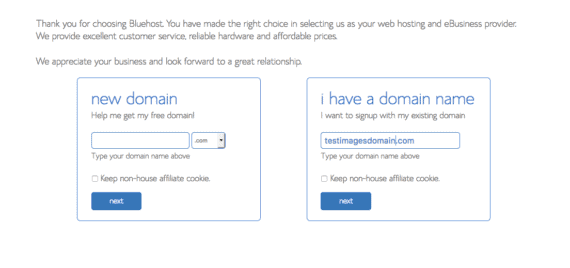
Now is the time to choose your domain name! By this point, you should know exactly what you’re looking for AND know that it’s already available, so this step should be nice and easy.
Word to the wise: make sure you double check your domain for spelling errors before you hit next!
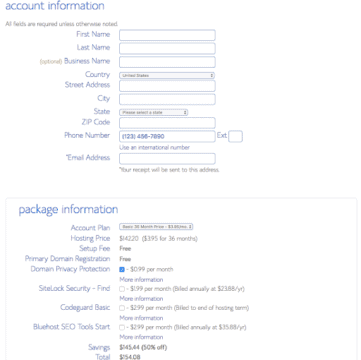
On the next screen, you’ll be taken to payment information.
At this point, you will enter in all of your personal information, and choose if you want any additional add ons to your website. You can also choose the length of your plan – 12 months, 24 months or 36 months. The 36 month plan will be the most affordable option, and also the most strategic if you’re starting your travel blog for the long-haul (which you should be!).
Next, it’s time to pay! Enter in your payment information and hit submit.
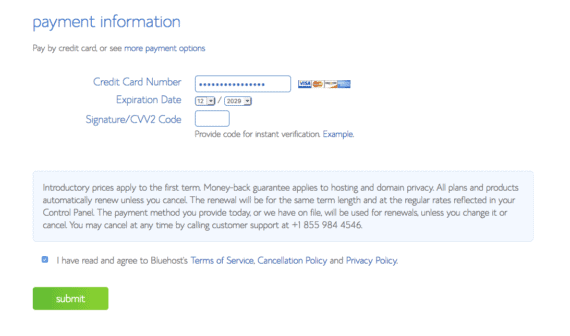
And just like that, you have a domain name and hosting! That wasn’t so bad, was it?
Once you’ve filled everything out, you’ll be directed to the following page to set your password.
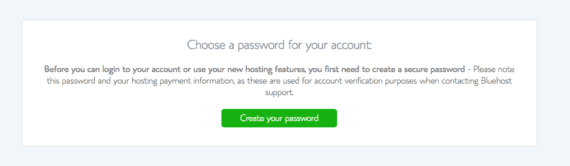
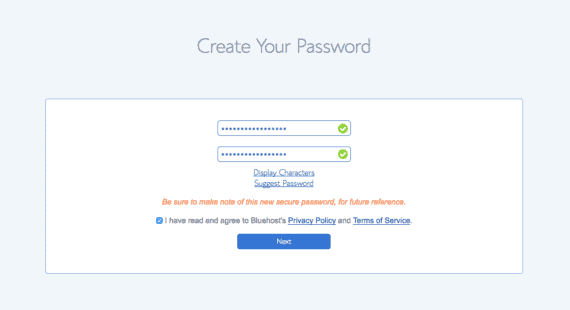
Hit “create your password” and set a password that you won’t forget!
Next, Bluehost will redirect you to a page to choose a theme. At this point, you can choose one of the themes they offer, or you can simply choose a theme to act as a placeholder for right now (we’ll talk about themes more in just a second!).
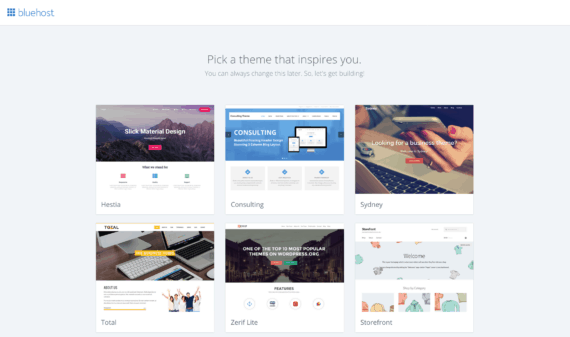
Once you’ve chosen a theme, it’s time to start building your website! Yahoo!

Step 3: Setting up WordPress
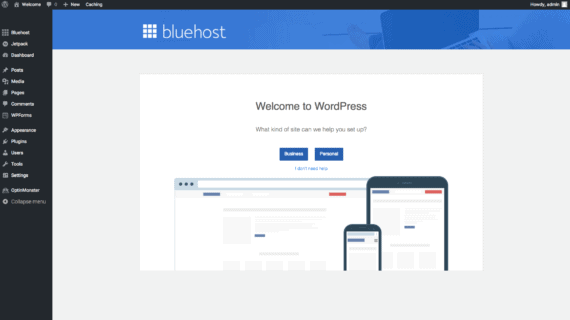
Alright, it’s time to start building your website! Here comes the fun part!
You’re going to arrive in the backend of WordPress at a screen that will prompt you to choose whether your website is “business” or “personal”. This is totally up to you, but if you’re looking to create a successful travel blog, we suggest choosing business!
Next, fill in a little bit about your website, including the title and description.

Now that you’ve got all the details ready, it’s time to launch your site! If you would prefer to keep your website as “Coming Soon” until after you’ve decided on a theme and have everything ready to go, you can skip this step and come back to it a little later on.
Step 4: Logging into WordPress
Logging into your site is super simple! Go to www.yourdomain.com/wp-admin and enter your login and password. The screen will looks like this:

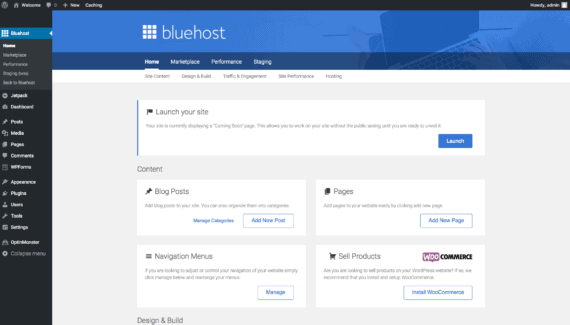
Once you arrive in WordPress, you will see your dashboard with all of your options for building out your website, including posts, pages, appearance (themes, menus, customize, widgets, etc), plugins, tools, settings, and more.
This probably all sounds overwhelming right now, but after a couple hours (or days) of putzing around in the backend of WordPress, you’ll feel right at home!
First things first, let’s find you a theme!
Step 5: Choose a Theme
WordPress has a ton of different theme options, most of which are free to use. Personally, we are fans of Studiopress and Divi themes (our website is built using Atmosphere from Studiopress). Both of these options come at a price, but the themes are much more functional and have great customer service.
Here are a few things to consider when choosing a theme:
- Mobile responsive
- Less is more – strive for simplicity!
- Browser compatible (ie. it works on all major web browsers)
- Supports plugins
- Customer support
- You love looking at it and you feel that it will showcase your travel blog!
Go ahead and choose a theme that you love! Purchase and install and it and begin customizing in under Appearance -> Customize.
Step 6: Post Consistently
So, you have your name & idea, your domain & hosting, you’ve installed WordPress, and you have a great theme. It’s now time to start creating your content and this is a really important step for a successful travel blog!
One of the key ways to ensure success with your blog is to post consistently. This means that you set up a content calendar and you stick to it. You let your audience know when they can expect content from you (daily, weekly, bi-weekly, monthly, etc) and then stick to it.
If you’re struggling to come up with content, we would once again recommend creating a listicle and getting some ideas from it!
Ways to Build Your Blog Audience:
- Post consistently
- Have great content with great photos
- SEO your website
- Share your posts with friends and family and social media
- Have fun and be passionate! Passion is addictive 🙂
BONUS: How Much Does it Cost to Start a Travel Blog?
Now, you may be wondering how much of an investment starting a travel blog is financially, so here is our yearly breakdown:
$67.18 / year for hosting of theworldwanderers.com
$27.87 for domain name registration and domain privacy protection (optional)
= $95.05 / year
If this hasn’t convinced, we’re not sure what will! 😉
Get all of this in PDF format so you can come back to it again and again! Get your FREE PDF here!
If you’re looking to become a travel blogger and life off of your blog, here are a few posts you may want to check out:
How we make money while traveling
5 Resources for a Successful Blog
Have any questions or comments? Don’t hesitate to let us know! And, if you enjoyed this post, please share!
*Please note that this post contains affiliate links. As always, all opinions remain our own and we would never promote a product or service that we don’t personally use and love.